Potato Planting Instructions
General Potato Growing Information
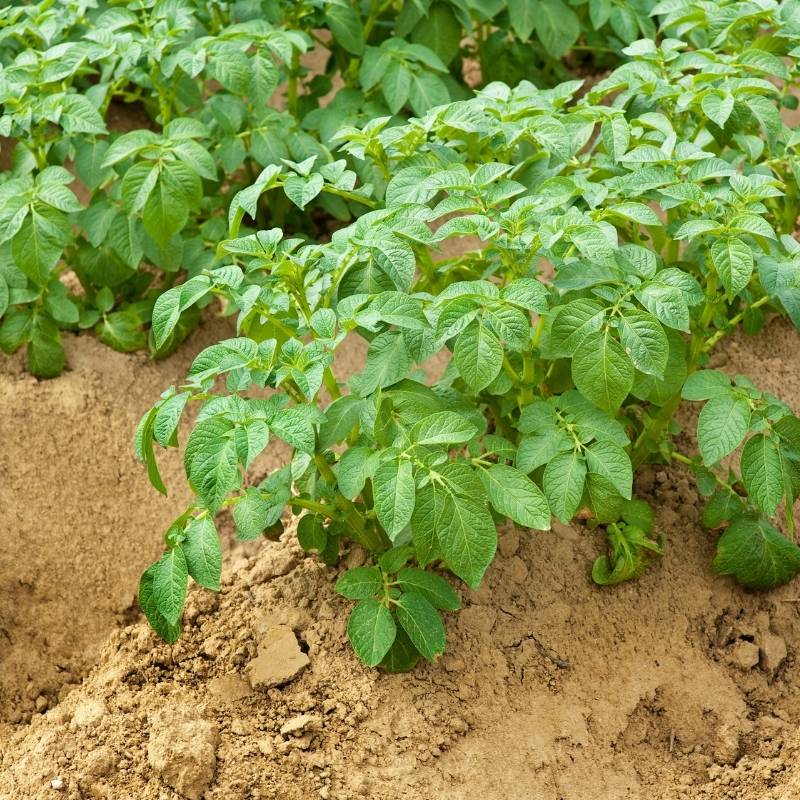
- Potatoes can be planted as soon as the ground can be worked, although some folks wait a bit to make sure the soil is not too wet. Soil temp around 45F is ideal. This time will vary by region. (In Wisconsin, we aim to get our potatoes in by the end of April.) Check with your local Extension office for information specific to your area.
- Potatoes can tolerate a light frost, however, they may need protection if there is a hard, late frost.
- They are very adaptable, therefore, will almost always grow a respectable crop even when conditions are not perfect.
- Potatoes like full sun coupled with fertile, well-drained soil.
- Equally important, keeping the weeds at bay assures a good crop.
Soil Prep for Potato Planting
- Prepare soil by tilling or manually working to provide a light & loose, well-drained soil. If you give your soil a nice deep dig at this time, it will be good for providing aeration & avoiding compaction.
- Give your soil some compost and/or fertilizer at this time. (Our Veggie Plus fertilizer or any all-purpose fertilizer would be a good option.)
Potato Seed Prep
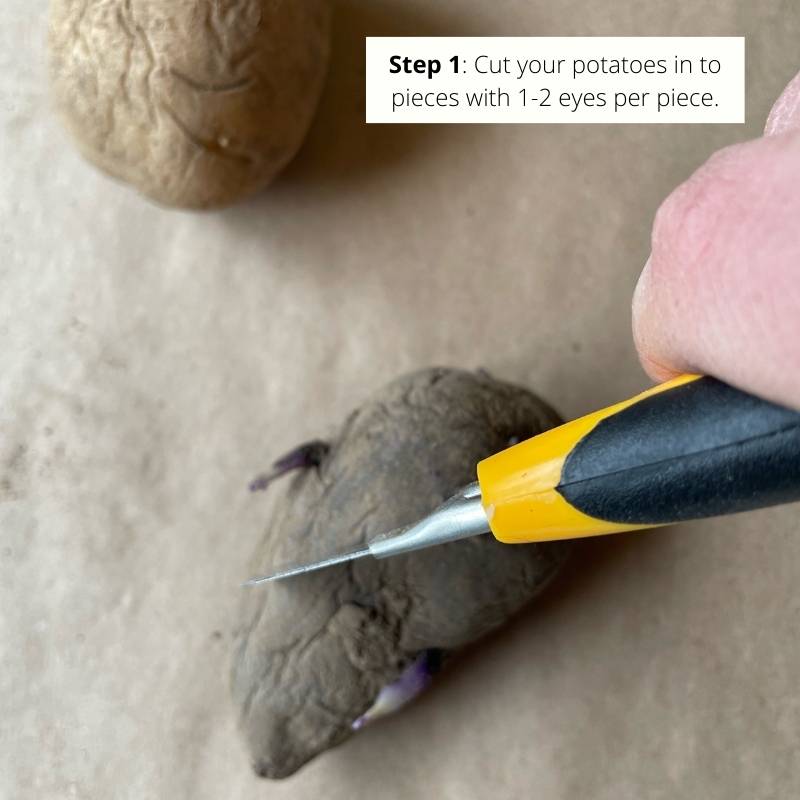
- 1-2 weeks before planting, if possible/necessary, put seed in the light and temps of 60-70F to begin the sprouting process.
- 1-2 days before planting, use a sharp, clean knife to slice larger seed potatoes into smaller pieces, each piece containing 2-3 eyes. (smaller potatoes can be planted whole)
- The tendency is a smaller piece will grow fewer, larger potatoes & a larger piece will grow more, smaller potatoes.
- Allow cuts to dry and form a skin before planting.
Potato Planting
- Dig a trench 6”-8” deep.
- Rows should be 2 ½ – 3 feet apart.
- Plant potato seed every 6”-12” depending on variety and how big you would like them to grow.
***If you want “Baby” potatoes, you can plant them in the 6”-8” range. Most other varieties do best around 12” apart. Some folks choose to plant Kennebecs a bit closer, at around 10” apart, so they don’t get too big.
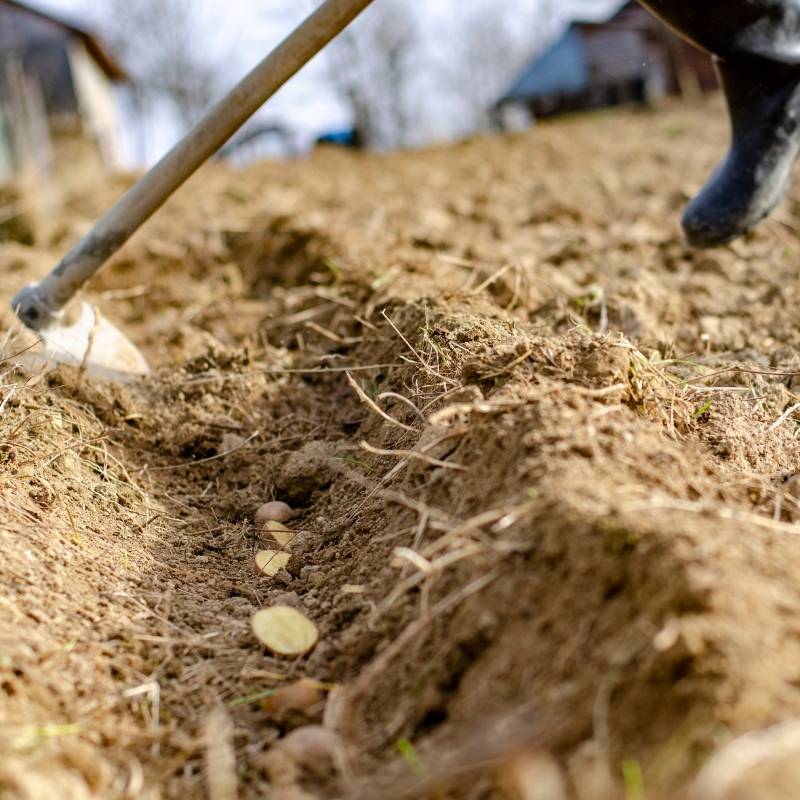
STEP 1: Place potatoes or potato pieces in the trench, cut side down & sprout side up at preferred spacing.
STEP 2: Cover the seed potatoes with about 4 inches of soil.
STEP 3: Once plants are 4-6” tall, add more soil to cover up the plants stem. Every time you do this, you will add more space underground for potatoes to grow. Each time you “hill” the potatoes, you can add a small amount of fertilizer. We use 1 Tablespoon of our Veggie NKO to each “hill”.
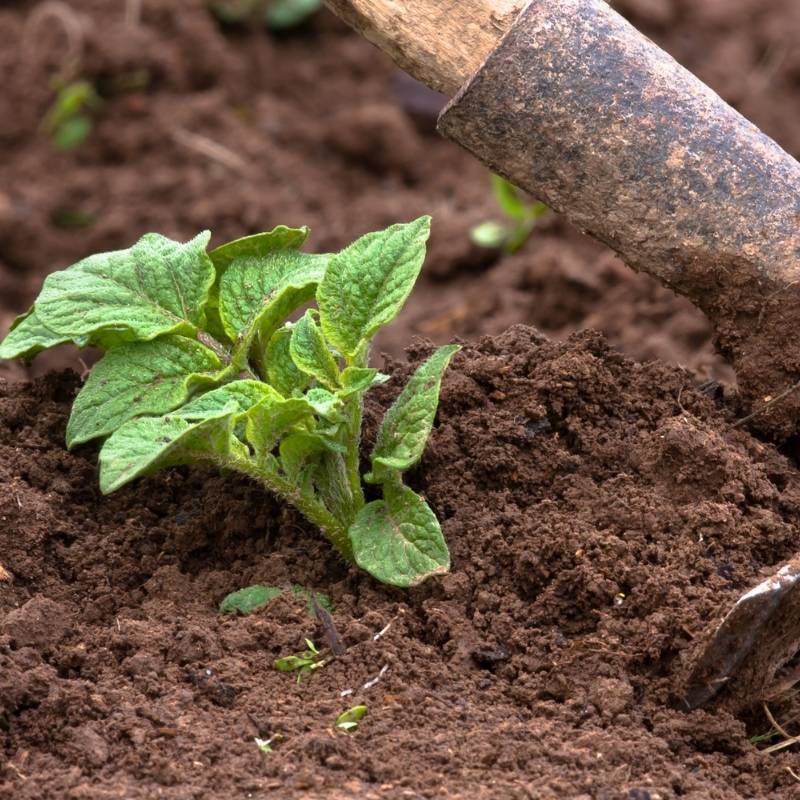
STEP 4: You can repeat Step 3 a couple more times, when you see the plant has grown another 4-6 inches.
Optional Step: At the point when plants have been “hilled” a few times, you can add a nice layer of straw mulch. This not only keeps the soil cooler & moisture more consistent, but can also keep down the Colorado potato beetle pressure.
**Optional: Potato Planting Instructions for Container Gardening
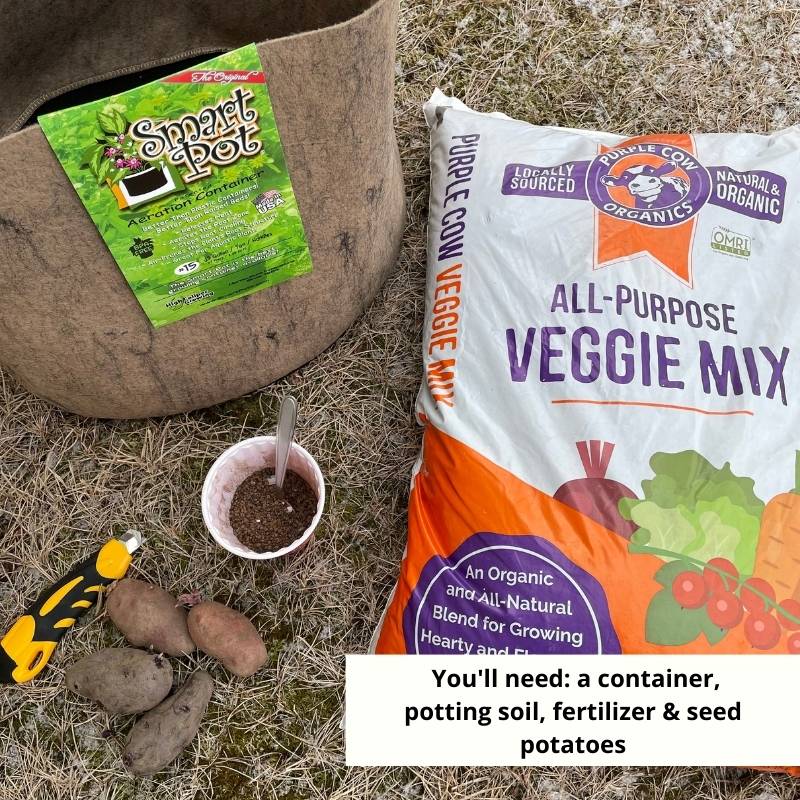
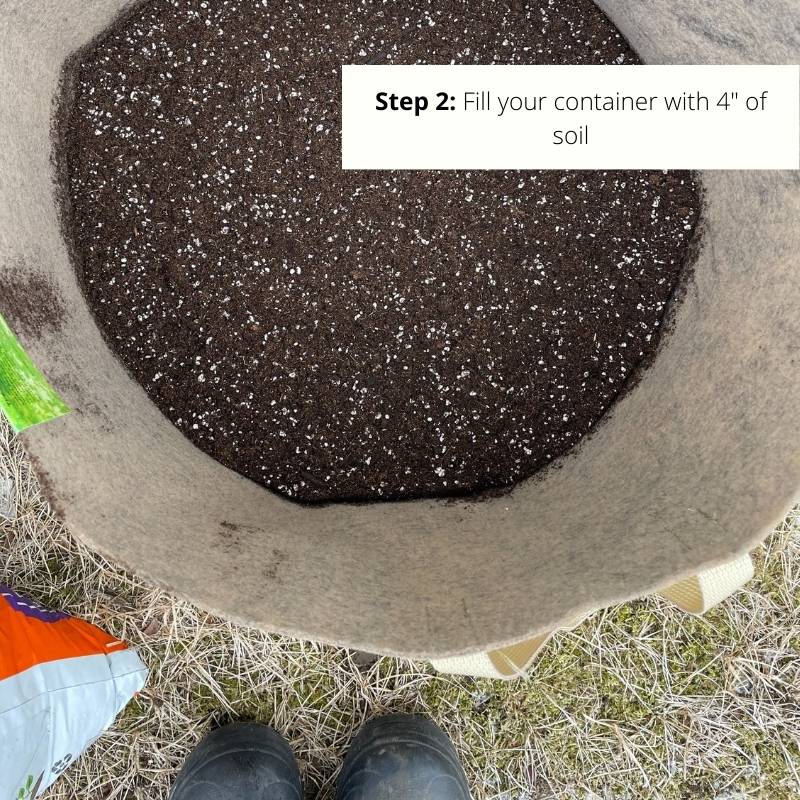
STEP 1: Fill container with about 4 inches of soil.
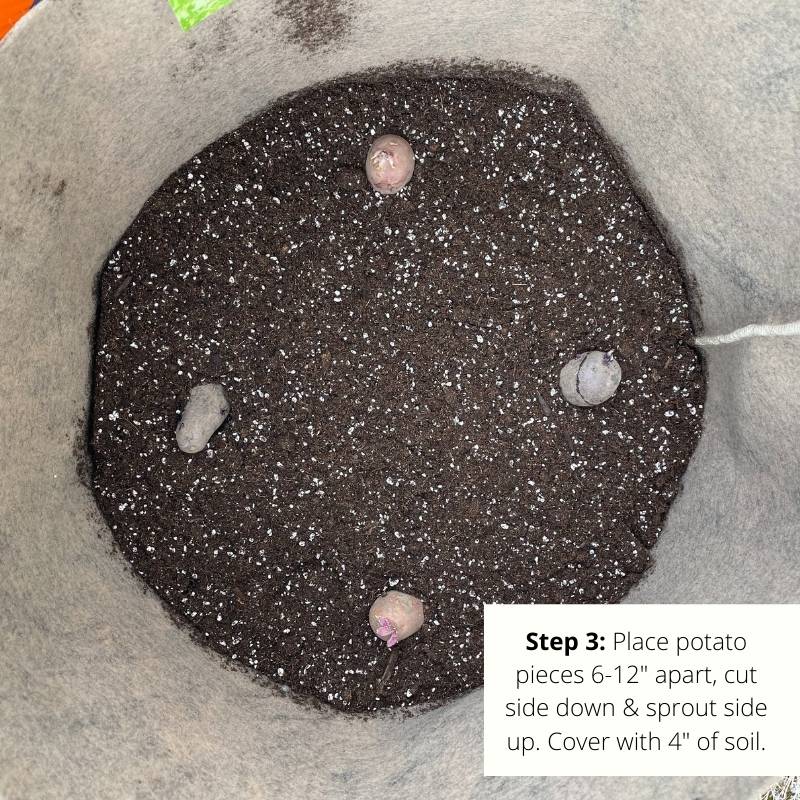
STEP 2: Place potatoes/potato pieces 6”-12” apart. Cut side down, sprout side up.
STEP 3: Cover the seed potatoes with ~4” of soil.
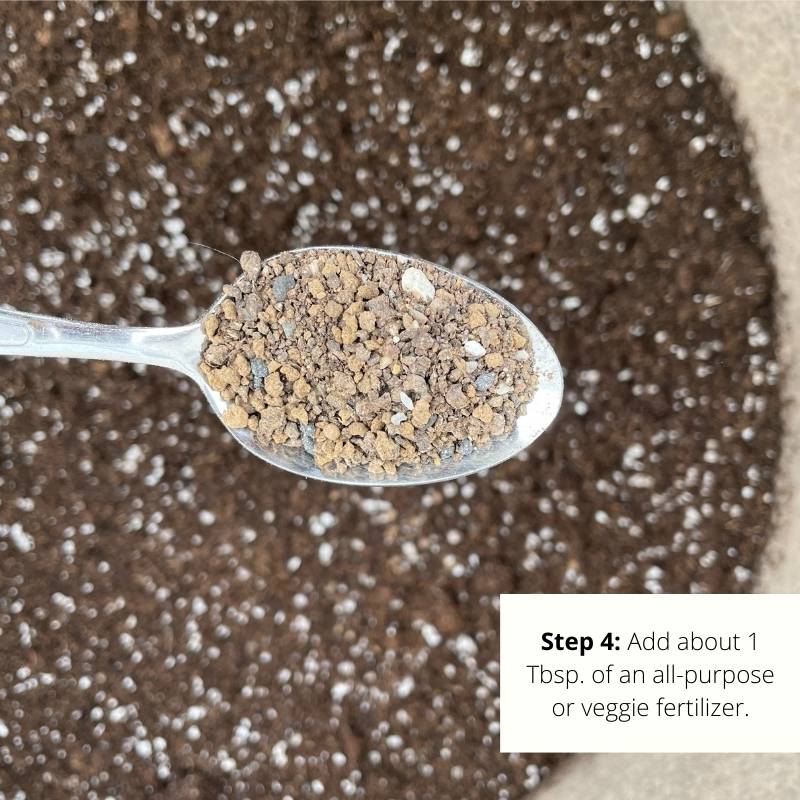
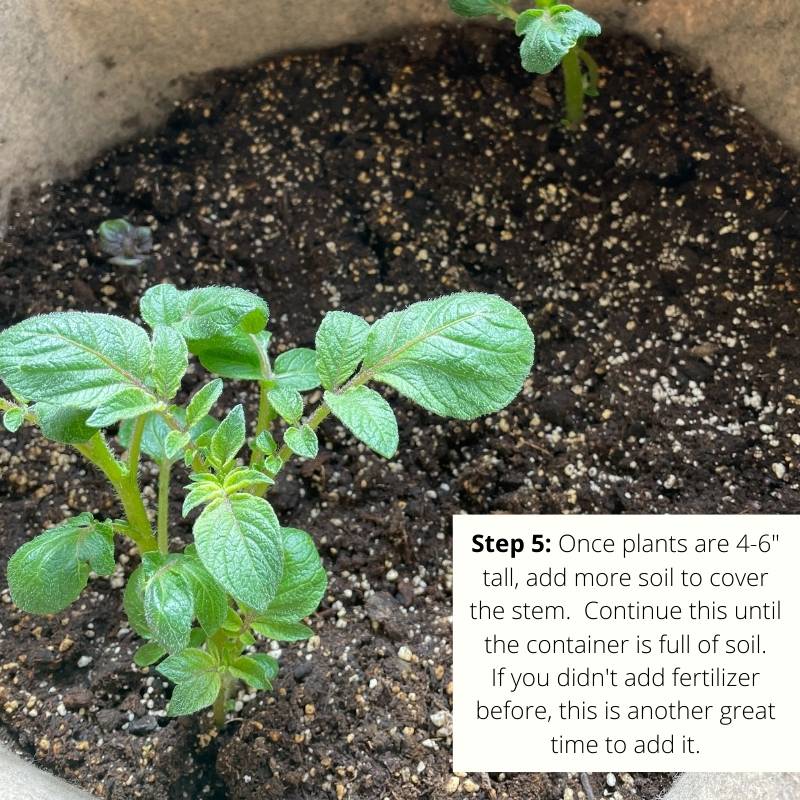
STEP 4: Once plants are 4-6” tall, add more soil to cover up the stem. Continue this until your container is full of soil. This is optimum time to add fertilizer.
At the end of the season, simply tip over your container and dig for your treasures!


Watering Potatoes
- Keep water levels consistent, especially when plants are flowering & immediately after. This is when the tubers are growing.
- Potatoes like 1-2 inches of water per week.
- Once foliage turns yellow/begins to die back, discontinue watering.
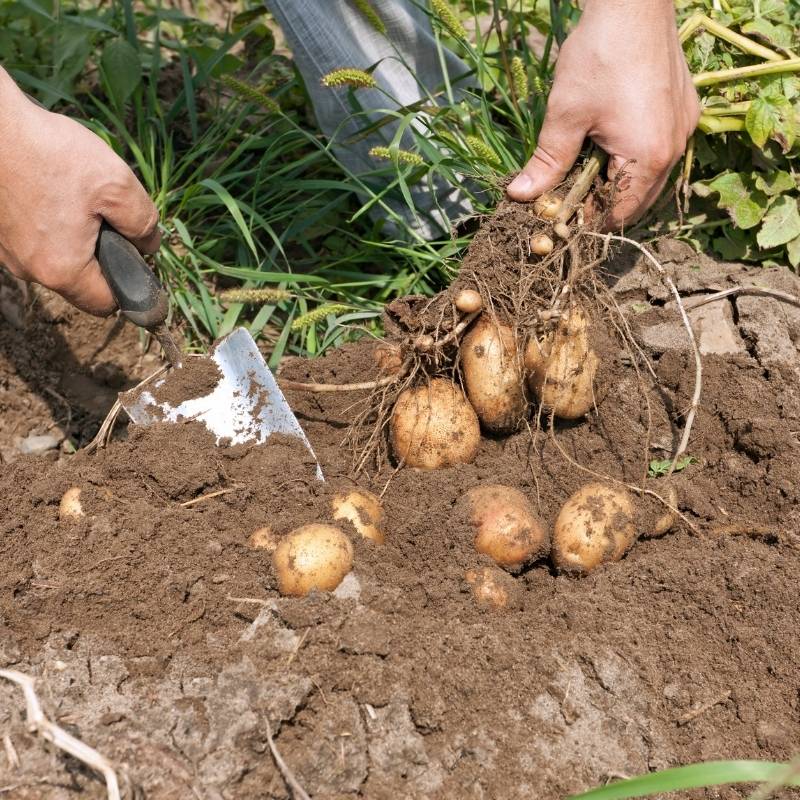
Harvesting Potatoes
- For “Baby Potatoes”- About 2-3 weeks after flowering is over, you can gently harvest the biggest ones & leave smaller ones to grow.
- “Baby Potatoes” are fresh and should be eaten within a couple of days from digging.
- Storage potatoes are best dug 2-3 weeks after the plant’s foliage has died back.
- Carefully loosen soil with a sturdy fork & hunt for treasures!
Curing Potatoes
- Cure in a dry, dark place with good air flow, unwashed for 2-3 days. A garage or covered porch would be perfect.
Potato Storage
- Try to find a place to store that is well-ventilated, dark & cool. Ideal temp is 40-50F. Keep in mind which varieties store best and eat them accordingly. We keep ours in a cool corner of our basement.
Disease-Free Potato Seed
Growing quality seed potatoes means growing disease free potatoes. To accomplish this, many states have established regulatory programs. Our seed potatoes are not only USDA certified organic, but they are also certified by the Wisconsin Seed Potato Program. The state program includes multiple on-farm inspections during the growing season, and a winter grow out in Florida. This level of inspection ensures that you receive high quality, disease free seed. Seed that is not monitored/State Certified will have an unknown level of disease. Disease in the seed results in a reduction of plant vigor and yield, disease spread to healthy plants, and potentially the introduction of pathogens into your soils. The lengthy inspection process covers leaf roll, mosaics, spindle tuber, bacterial ring rot, blackleg, rhizoctonia, verticillium, mycoplasmas, white mold, early blight, late blight, variety mixture, growth and vigor, insect control, weed control, isolation and stand.
Eating Your Potatoes!
Our Keene Garlic Seasonings pair very well with potatoes: We just love using our Cajun & Adobo Seasonings, Curry Powder, Garlic Scape Salt, Granulated Garlic with Smoked Salt & more!
Fun Ways to Use Your Potato Harvest
- Roasted Potatoes: Cut them up into ~1 inch pieces with or without skins. Toss with olive or avocado oil and season with garlic powder, sea salt & pepper. (When we want a little kick, we also toss them in our Keene Garlic Cajun Seasoning!) Roast in the oven at 375F for 25-35 minutes.
- The BEST Classic Baked Potato: Pierce the skins several times with a fork or small paring knife. Place on baking sheet. Bake at 450F for 25 minutes. Then pull out, brush potatoes with butter or olive oil and sprinkle with sea salt. Flip the potatoes on the pan & return to the oven for 20 more minutes. Give them a squeeze to be sure they are done. Bake for 5-10 minutes longer for extra large potatoes. Slice down the middle & add your favorite toppings. (We love a sprinkle of our homemade garlic scape salt & fresh cracked pepper. Garlic scapes & chives are a lovely addition as well!)
- Garlic Mashed Potatoes—Of Course!
Roast a whole head of garlic by cutting off the top and drizzling with olive oil, bake at 400F for around 25-35 minutes. Boil your potatoes until done & drain. Mash your potatoes & roasted garlic with a nice pinch of sea salt & cracked pepper. Warm milk & butter and incorporate into the potatoes & ENJOY!
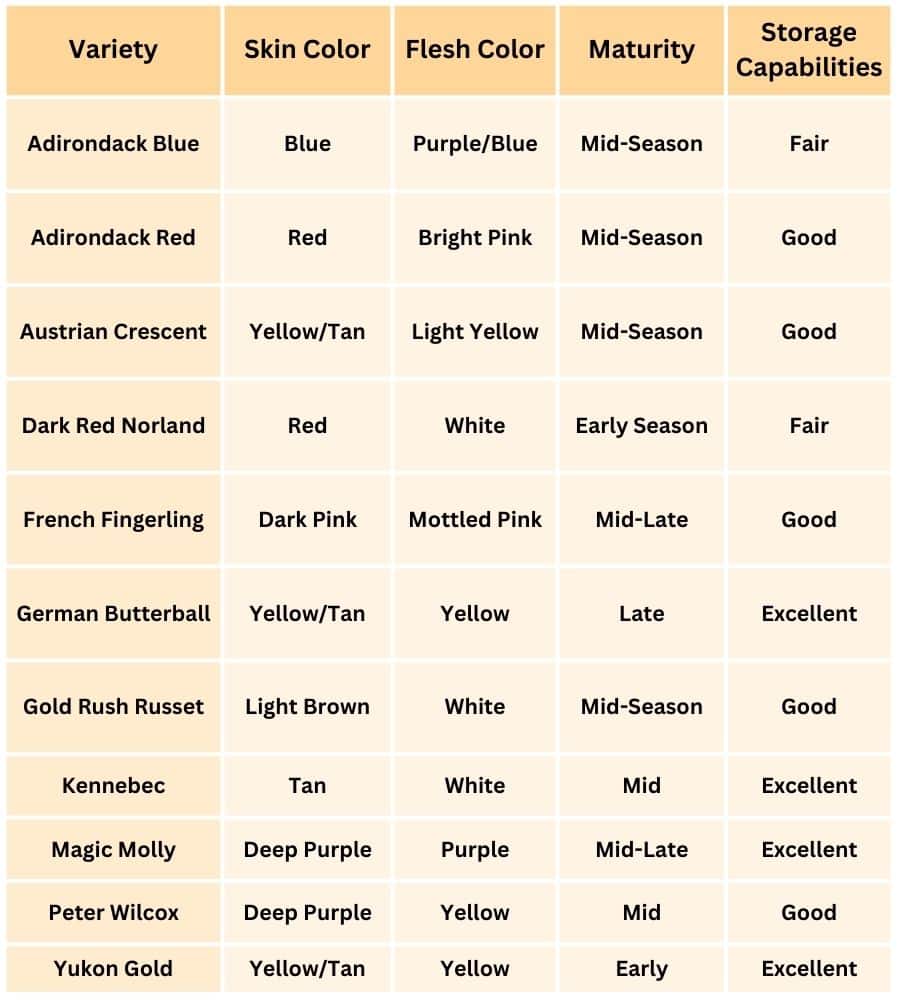
Varietal Information
Excellent information. Some of your tips I have never seen before. Looking forward to even better production next year. When can I order seed potatoes from you for next spring?
we’ll begin to offer pre-orders for seed potatoes this upcoming winter
I agree. I appreciate the useful details, especially as some of the information is variety specific.
Glad it was helpful!
You didn’t talk about the difference between between determinate and indeterminate potato types when planting.
Indeterminate potatoes tend to have a longer season, long, viney growth with flowers on stems that continue to grow, and produce berries over a long time. Determinate potatoes have a shorter season, growth is more bushy, fewer flower clusters at end of each stem, and produce berries in a short window.
What about potato bugs?
We have found the most effective way to control them is by hand picking them off the plants. Diatomaceous Earth can be used with decent success. We have also heard good things about using beneficial insects, being sure to rotate where you plant each year, and planting a bit later in the season.
I have ordered from you twice and say you do have great quality and customer service. I live n zone 9, Sacramento area. The heat is what I have trouble with, could be also not sure how much water. Growing here can be challenging, especially times were it gets really hot for a long time. If you have any tips for me, I would appreciate it. R
Thank you!